


Greetings, and thank you for stopping by! This is the editorial team of “GameWith,” a Japanese game information website.
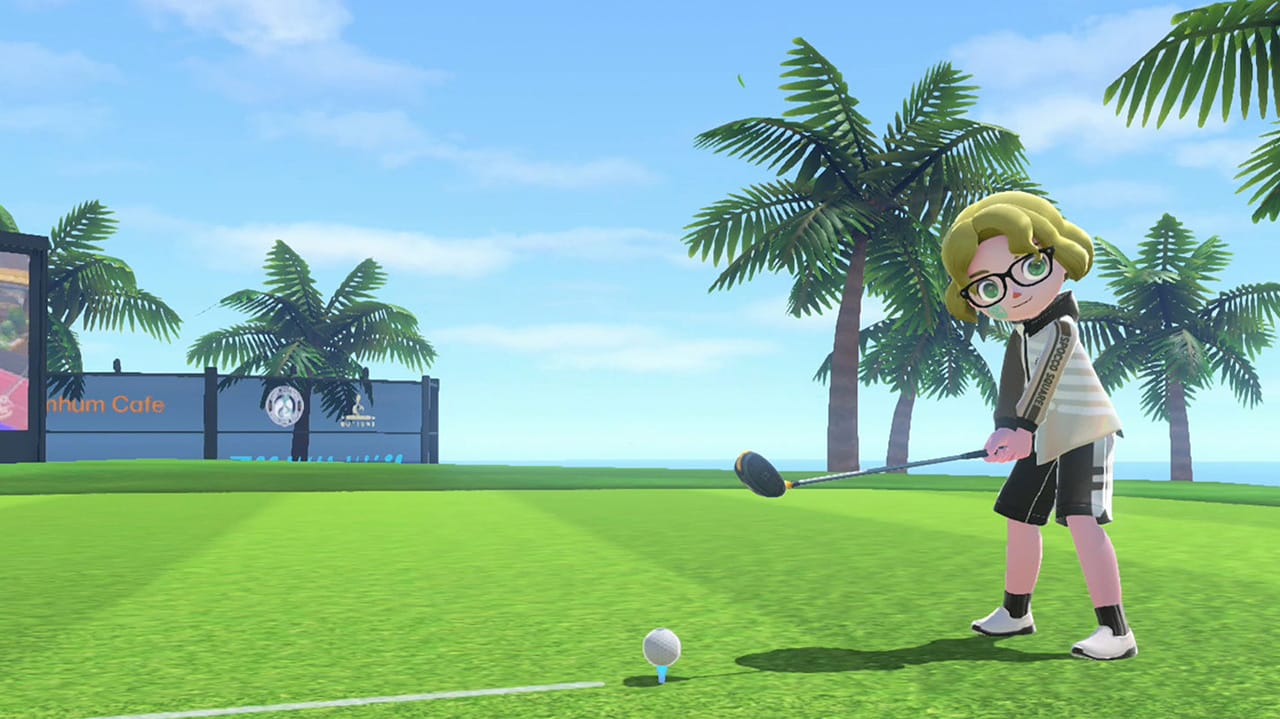
This time, we'll cover Golf, which was added to Nintendo Switch Sports in November 2022. Allow us to share some tips and techniques about this newly added sport and share a few simple things you can keep in mind to get a higher score.
*This article was written with right-handed use of the Joy-Con (R) controller in mind.
Basic rules and play modes
Like the actual sport, the goal of Golf is to sink the ball into the cup with the least amount of strokes. Each hole is assigned a set number of strokes to complete (called the par), and a player's score is calculated based on how many strokes they used compared to that number (par +/-0 is par, par -1 is a birdie, par +1 is a bogey, and so on). The winner is determined based on the total score.
"Play Locally" (offline play) allows you to compete against family and friends nearby with up to four players. You can choose the course and the number of holes. Of course, there's always the option of Single Player mode until you feel confident enough to challenge someone else.
Golf courses are split into beginner, intermediate, and expert difficulty levels. If this is your first time playing, we recommend trying the 3-hole beginner course to get used to the controls first.
As for "Play Globally" and "Play with Friends," they're both online game modes* where you can enjoy golfing with friends who are far away or other players from around the world. Games played in the "Play Globally" mode can accommodate up to eight players on a course at a time in Survival Golf. The player with the highest amount of strokes will be eliminated until a victor emerges.
*A paid Nintendo Switch Online membership is required to play online.
Basic tips for improving your skills
Now, let's cover some tips and tricks for quickly getting better at the game of Golf. Allow us to first introduce some basic elements that you should keep in mind.
Understanding the terrain
Always check out the terrain for each hole. Use our list of terrains and their characteristics below for reference.
Fairway
The fairway is first on the list. This refers to the striped field that stretches from the teeing ground (where your first shot is taken) to the green (the putting area with the golf cup).
This area is the easiest to control where your shots go, so keeping the ball on the fairway as much as possible while aiming for the green is the key.
Rough
Next, let's talk about the rough. In this area, the grass is darker than the ones in the fairway. Extra care is needed when hitting a ball from the rough as your maximum shot bar is reduced by a quarter, and chances of the shot skewing towards the wrong direction are much higher.
While the rough is an area you want to avoid for a smoother game because it occupies the majority of the course, sometimes the ball ends up there anyway, even though you were aiming for the fairway. If that happens, don't despair! Although it impacts your shots, making a recovery is well within the realm of possibility. So, stay focused and target the fairway or the green on your next shot.
Bunker
The bunker refers to any sandy area on the hole. Like the rough, shots from this terrain tend to go in the wrong direction, and depending on the club you use, the shot bar is even weaker than when hitting the ball from the rough. Avoid landing in this area altogether if possible.
OB / Penalty areas
Last but not least, there are the OB and penalty areas. OB (out of bounds) refers to the area outside the rough with very dark-colored grass. Penalty areas are the lakes or waterfront spots on the course.
If your ball lands in any of those areas, the round ends for you, and you’ll be slapped with a +1 score penalty. Unlike the rough or bunker, landing in these areas makes your score increase without giving you a chance to keep playing, so mark them as areas to avoid at all costs.
Learning the features of each golf club
Now that you're familiar with the various terrains on a golf course, it's time to turn our attention to the golf clubs. There are five main types of clubs, each with its own flight distance, trajectory, and other features.
When preparing for a shot, depending on the distance to the hole, an appropriate club is automatically chosen for you. This is usually not a problem unless you need more flight distance to combat a headwind or a lower trajectory to avoid hitting trees in the way. In such cases, manually switching to another club may be the more appropriate action to take.
Once you're used to the clubs, you'll naturally know which one is best for any situation.
Types of clubs
・Driver
Has the longest shots with a low trajectory.
・Spoon
The second longest shots after the driver. Has a higher trajectory than the driver but lower than the iron.
・Iron
A club that can be used accordingly based on the distance you aim for. This club comes in numbers that range from 3 to 9. The larger the number, the shorter the shots and the higher the trajectory.
・Wedge
Used when launching a short approach shot near the green, or to get the ball out of bunkers.
・Putter
Useful for putt shots on the green when you want the ball to roll and not jump.
Perfecting your aim with practice swings
Before hitting the ball, swing the controller without pressing the ZR Button to carry out a practice swing. It's a very useful way to test out the strength and direction of your swing.
The shot bar displays the strength of your shot and can be read alongside the minimap on the right-hand side of your screen. Notice that they both have a corresponding number of evenly spaced dots. The dots on the minimap represent where the shot will land if the terrain is flat. Use the minimap as a reference when determining where you want the ball to go, then adjust the strength of your swing accordingly, using the dots on the shot bar to get the ball there.
Adjusting your shot strength
The shot strength indicator is a white line on the shot bar that shows up when you prepare to take a swing. Unless you make a particularly hard or soft swing, this is roughly the strength you'll be hitting the ball with. To avoid any surprises, aim to make your swing with just the right amount of strength.
Speaking of swinging, remember to swing all the way! Not doing it fully will result in a weaker shot, which may mess with your original plans. Keep in mind the full swing, and you’ll have a better chance of hitting the ball exactly as you imagined.
Lock your wrist and avoid swinging too hard
Keeping your wrists stable and not swinging too hard is key for a straight shot. When your wrist is bent, or you swing way too hard, the bar will curl to the left or right. That's an indicator that your shot won't be going in the direction you want it!
Until you set the shot position with the ZR Button, you can keep readjusting with the X Button as many times as you like, so get into the habit of using practice swings and checking every little thing. Also, keep in mind to relax and your shot will never go wide again.
Decide on shot strength and direction AFTER checking the wind
Since golf holes are in the open, an unexpected gust of wind may sometimes affect your shot in ways you hadn't expected. Adjust your strength if a headwind is blowing. Tweak your direction if a crosswind is blowing. As such, it is necessary to predict how the shot will change depending on the wind direction and speed, to determine the strength and direction of the shot.
Information about the wind is shown in the top right-hand corner of the screen. The number indicates wind speed, and the arrow, wind direction. The color of the arrow indicates wind strength. Blue means weak, yellow means medium, and pink means the wind is at its strongest. For starters, learn to eyeball the arrow's color quickly for good information to act on.
It's not easy for new players to imagine how much the wind will affect their shot, so go ahead and practice on different holes to feel the effects of different wind patterns firsthand. There's no better or faster way to get the hang of this, trust us!
Putt with extra care
Once you hit the green, it's time to target the cup with a putter. Just take note of this: there's no line indicator on the shot bar when you're putting, so it's a lot more difficult to fine-tune the strength of your shot. This is the time to make full use of those practice swings!
Hold down the left or right stick to change camera angles when you're putting to have a closer look at the inclination of the green.
Press the B Button to see the elevation change to anticipate the slope and curvature to the cup and determine how strong you should stroke and in which direction.
Quick review of this section
- ・Learn the areas of a golf course and the characteristics of the different golf clubs.
- ・Practice makes perfect. Keep adjusting strength and trajectory to satisfaction.
- ・Anticipate the effects of the wind's speed and direction on the ball.
- ・Check the inclination of the green before putting.
Practical tips for getting better
Now, let's see how to apply those tips we've just learned to achieve a better score.
The goal is to get closer to the cup
When preparing for your approach shot, the goal is to get as close to the cup as possible by considering how long the ball has to roll to reach it.
Hitting the ball at the exact dot that overlaps with the cup will just cause the ball to roll farther behind it. Instead, aim for a strength that is slightly weaker than the perfect spot, as it's easier to get the ball closer to the cup this way and ensures a better score.
Now, if you're approaching from somewhere near the green, you'll sometimes need to make it a weak shot (around the first dot on the bar). Be careful though, as if the shot is too weak, it may not have the force to reach the place you were aiming for. Balance is needed!
When you want a weak shot, it's easier if you pay close attention to the amount of strength you're putting into your swing the moment it impacts the ball. Make use of the practice swings to get that moment just right!
Be conscious of the height differences in terrain
Even if you hit the ball with the correct amount of strength using the shot bar and minimap, if there are elevation differences, it would make it difficult for the ball to land on the spot you were aiming at. You may have to adjust your strength based on how high or low the ground in your targeted area is. Here are a couple of video references demonstrating two different cases.
When hitting uphill
When hitting downhill
Using backspin to stop the ball at the right spot
Have you gotten used to the game controls now? Try adding some backspin to your shots to make your ball stop exactly where you want without having to hold back on your swing strength. You can execute a backspin by stopping midway through your swing. The lower you stop the controller directly below, the stronger the backspin, and a powerful swing will result in a powerful backspin.
Most people execute a backspin with an iron or wedge club when trying to get close to the cup (drivers and spoons can't do backspins). A well-executed backspin can either stop the ball from rolling too far after landing or make the ball roll back toward the cup from a distance away. Adding a backspin makes it easier to get as close to the cup as possible.
Things to keep in mind when using backspin
As useful as applying a backspin may sound, there are some things to keep in mind when using this technique.
First is the elevation change near the cup. For example, if a ball with a backspin lands on a downhill, there's a high chance the backspin will instead make the ball roll farther away from the cup than intended.
On the other hand, it's easier for the ball with a backspin to come to a stop if it lands on an uphill. Therefore, always check the elevation change on the green with the B Button before making your approach.
Another thing to keep in mind is the position of the cup. If it's deeper into the green, there's no need to use a backspin to get closer because it may, in fact be easier to simply approach the cup from the front. Make sure to check this along with the elevation change mentioned in the previous section before deciding whether to apply backspin.
Quick review of this section
- ・Aim to get closer to the cup instead of aiming directly for it.
- ・Adjust shot strength based on terrain height.
- ・Use backspins as needed to get close to the cup.
A secret code to unlock Blind Mode
Psst...just between you and us, we wanted you to know about something called the Blind Mode that you can access by inputting a certain sequence of button presses before playing.
As its name suggests, Blind Mode turns off the guides on the screen, allowing you to enjoy the sport more realistically. Landing the shot is now much more difficult since you won't have help from the minimap, wind indicator, or shot bar anymore.
This mode is available when you're playing locally or with friends. When selecting Golf as your sport of choice, press ZR+R+A until you hear an unusual sound effect, indicating that your command to enter Blind Mode has been accepted. Why not use this mode as a litmus test to see just how adept you've become at the game with the tips presented in this article?
Final thoughts
We have introduced the basic rules of golf and some tips on how to become better at the game.
Among the many tips shared, I would say that the practice swing is the key. You see real life golf players doing this on the course as well, and it's not for luck! These practice swings help to imprint in your mind the best way to swing and hit the ball before actually doing it. They are essential aids that will help you get better at the game in a slow but steady way.
The feeling of sheer satisfaction you feel when your carefully planned swing hits the ball just the way you imagined cannot be easily replicated anywhere else. We hope you take this article as a reference and enjoy playing Golf on Nintendo Switch Sports!

