Nintendo Switch Pro Controller
With its ergonomic grips, Nintendo Switch Pro Controller (sold separately) is recommended for extended gaming sessions in TV Mode and Tabletop Mode.
*Nintendo Switch Pro Controllers can be used with compatible titles, as indicated on the back of the packaging or on the game's summary screen.
Pairing with Nintendo Switch
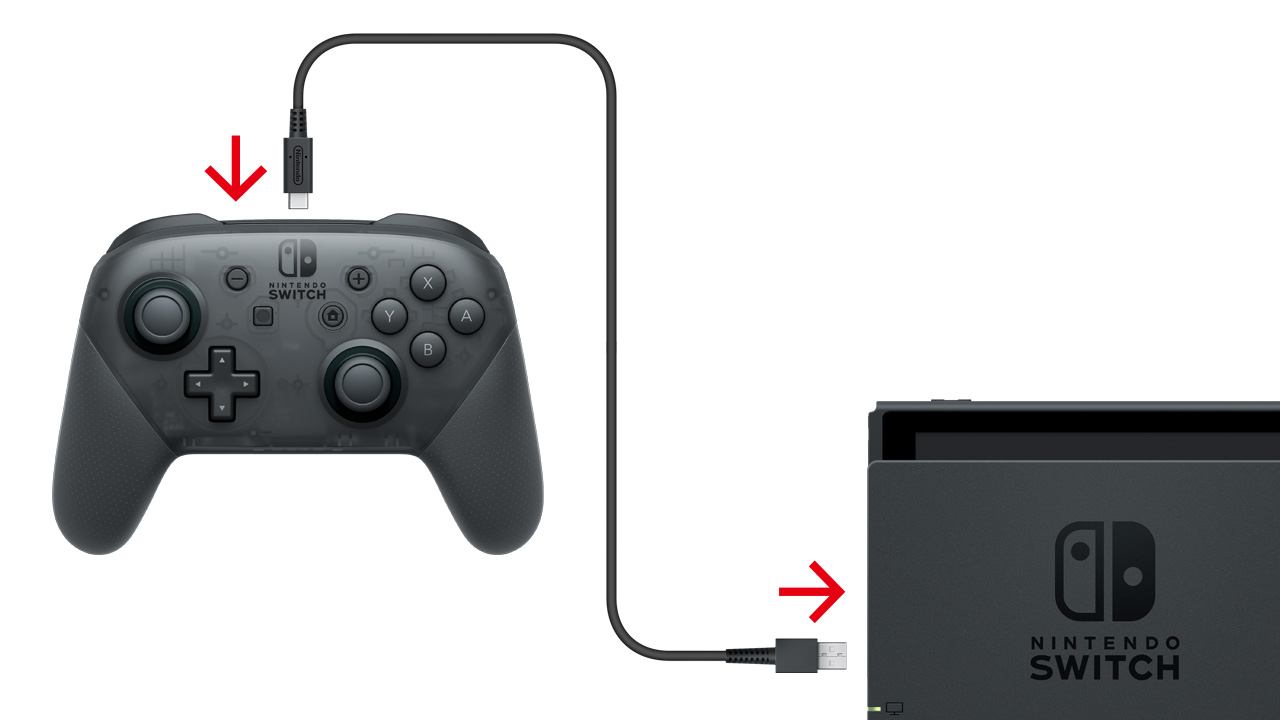
In TV Mode, connect the Nintendo Switch Pro Controller to a Nintendo Switch dock via a USB charging cable [HAC-010] to pair the controller and charge it as you play.
Paring with Nintendo Switch Lite
*For information about charging, see the "By connecting an AC adapter directly" section on the "Charging" page.
With Nintendo Switch Lite, you must pair your Joy-Con controllers wirelessly.
-
1
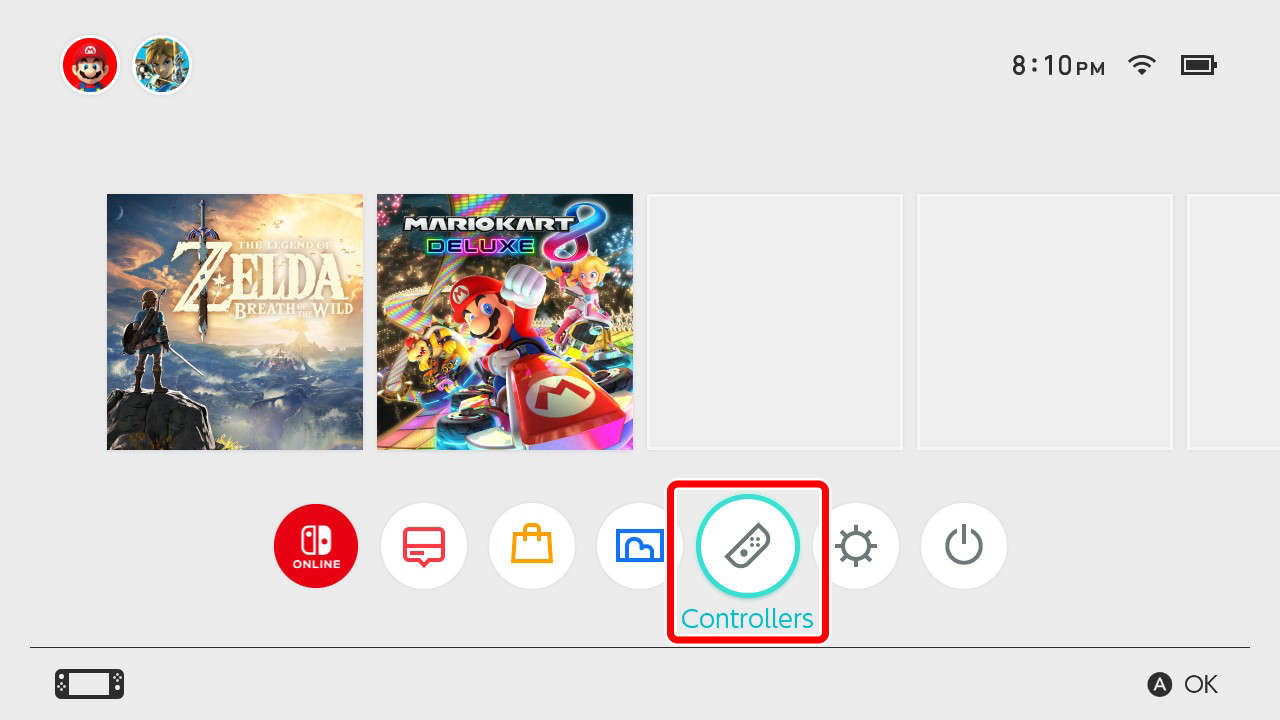
Select "Controllers" → "Change Grip/Order" on the HOME Menu.
-
2
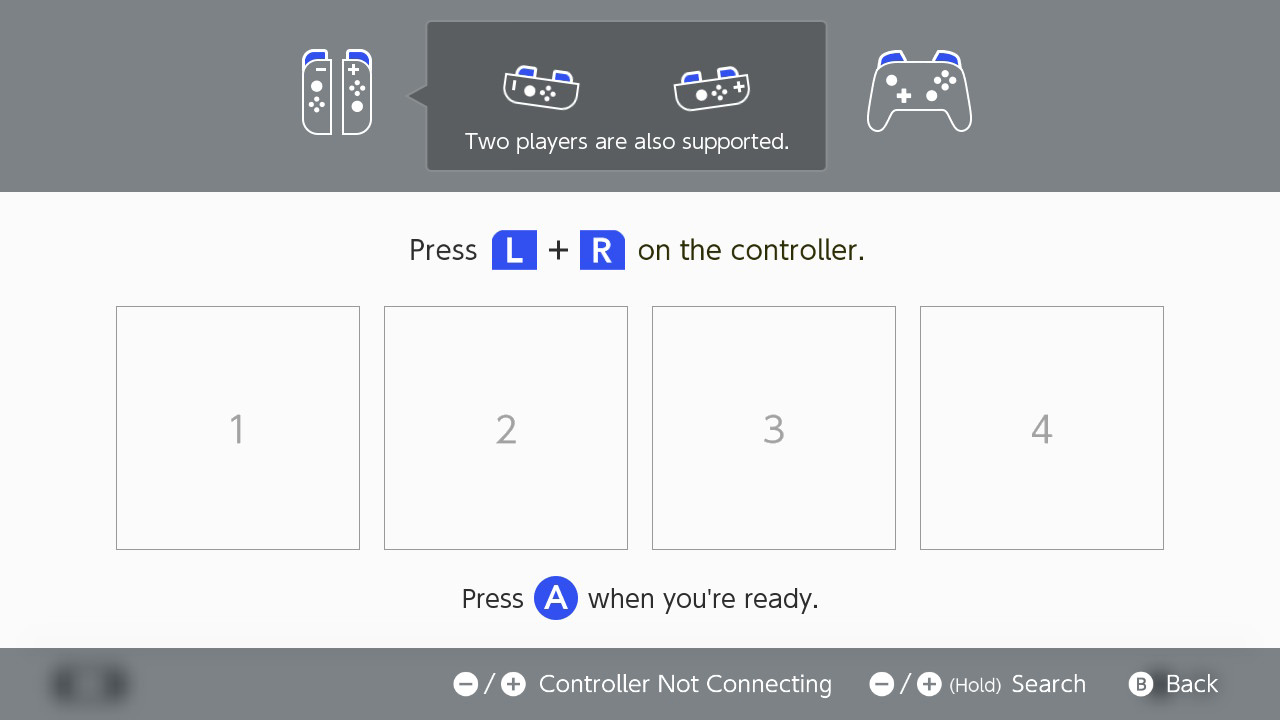
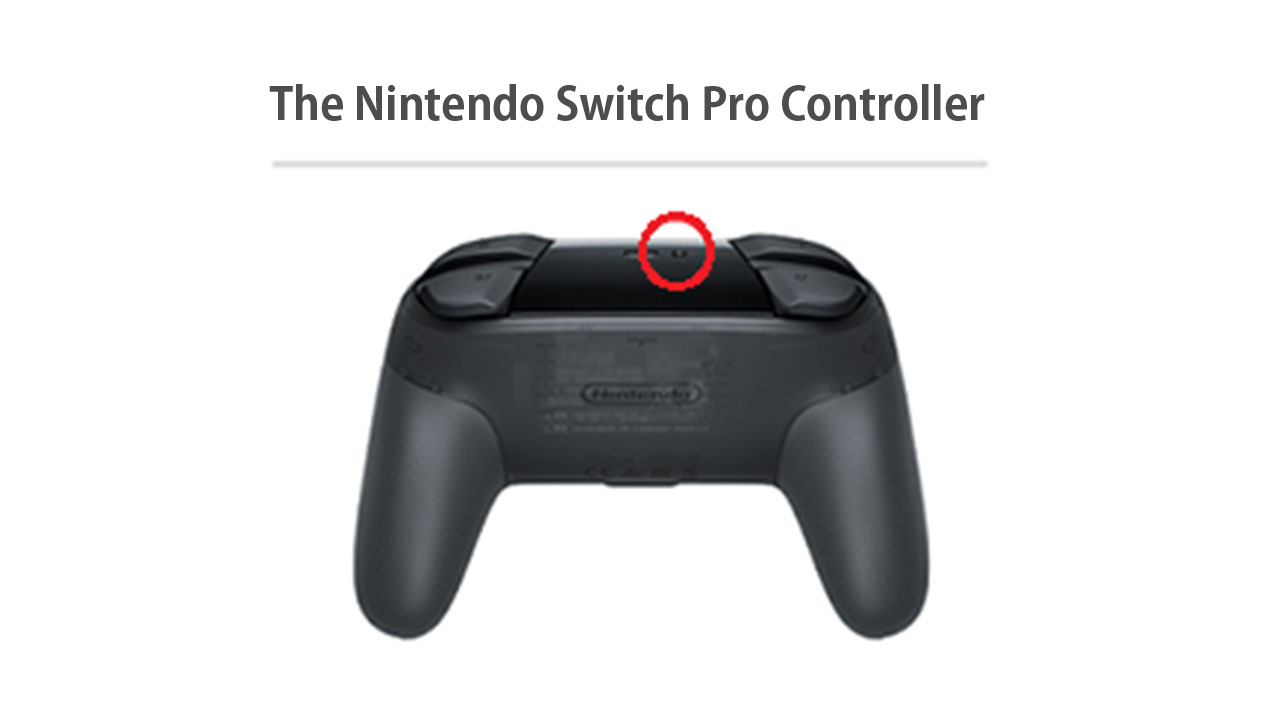
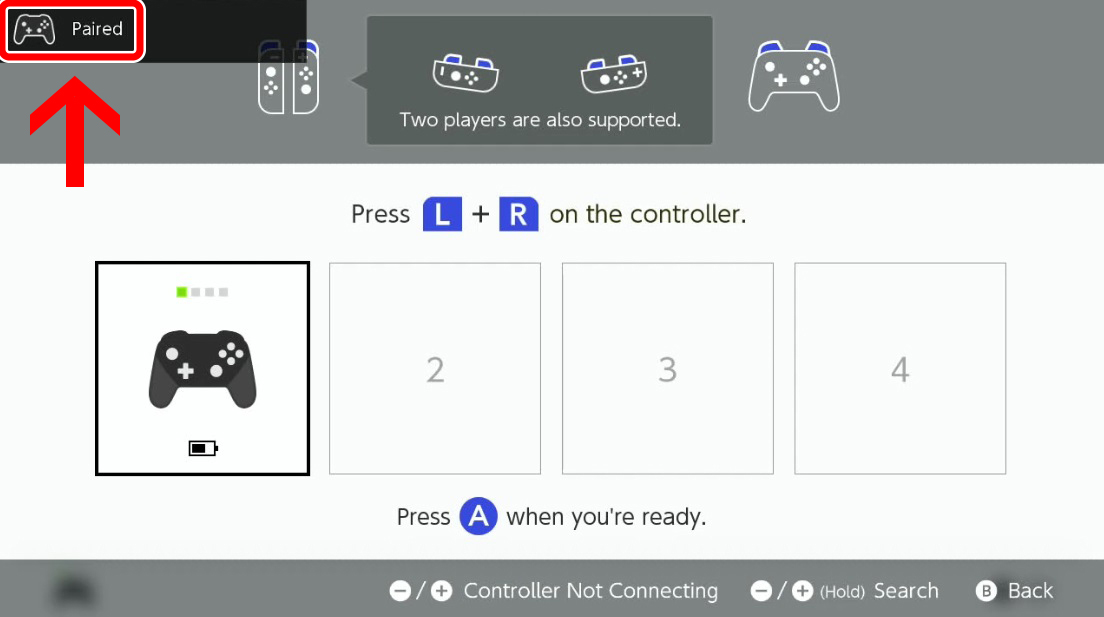
Once the screen pictured here appears, hold the SYNC Button on the Nintendo Switch Pro Controller that you'd like to pair.
-
3
When the message "Paired" appears on the screen, pairing is complete. Press the A Button to end the process.
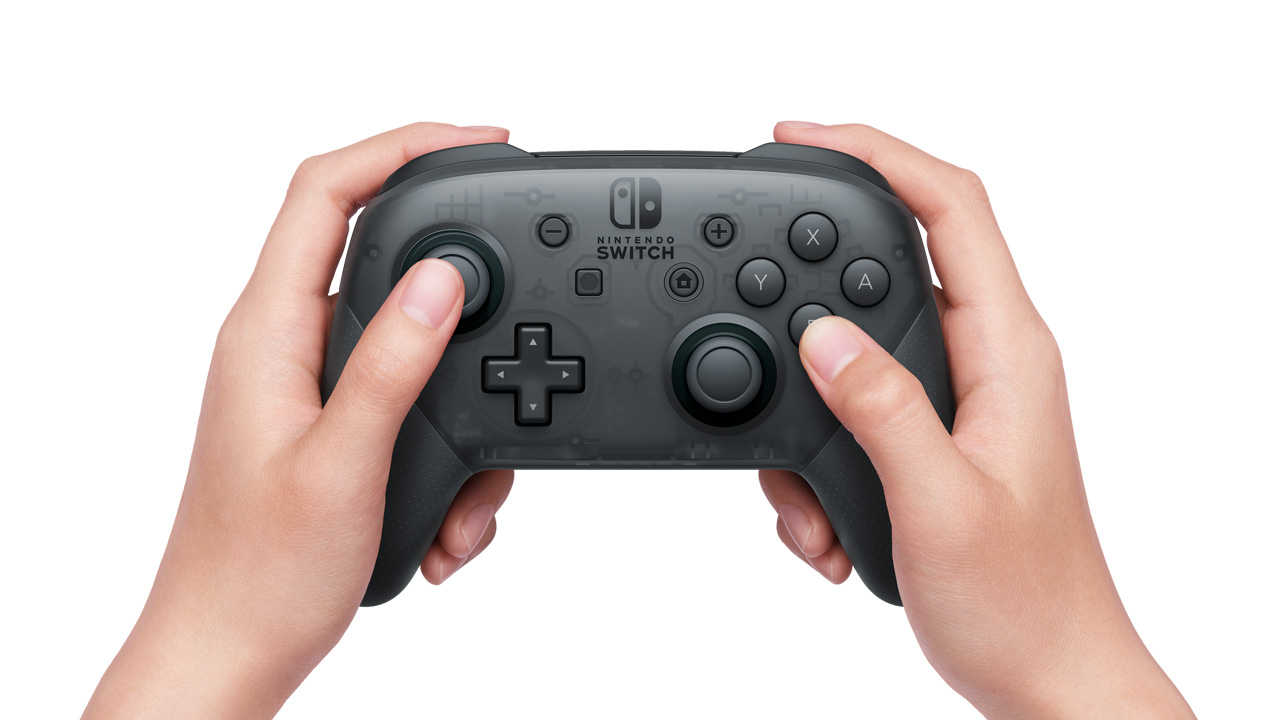
Using your Nintendo Switch Pro Controller
Once charged, you can use your Nintendo Switch Pro Controller as a wireless controller.
Changing the button mapping
With system version 10.0.0 or higher, it's possible to change the mapping of Nintendo Switch Pro Controller buttons.
*Button mapping is possible with the right and left Joy-Con, Nintendo Switch Pro Controller and Nintendo Switch Lite. The feature is not available with other types of controllers.
Button mapping procedure
-
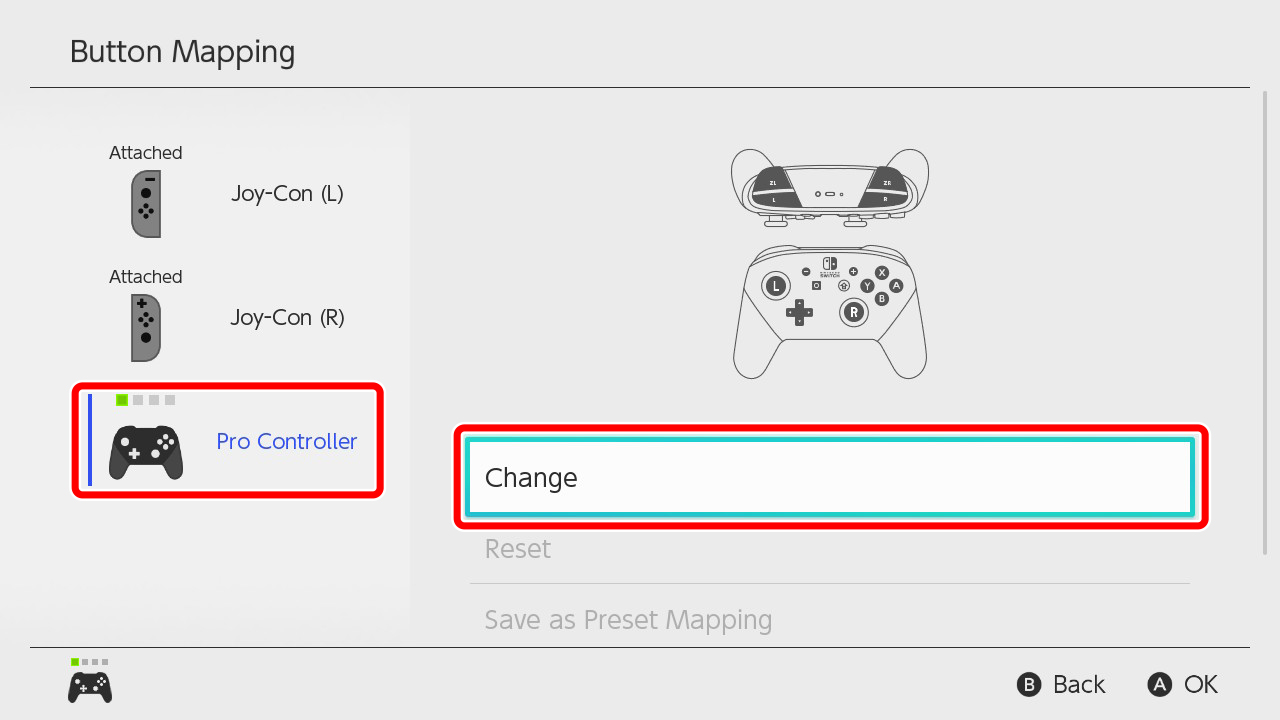
1
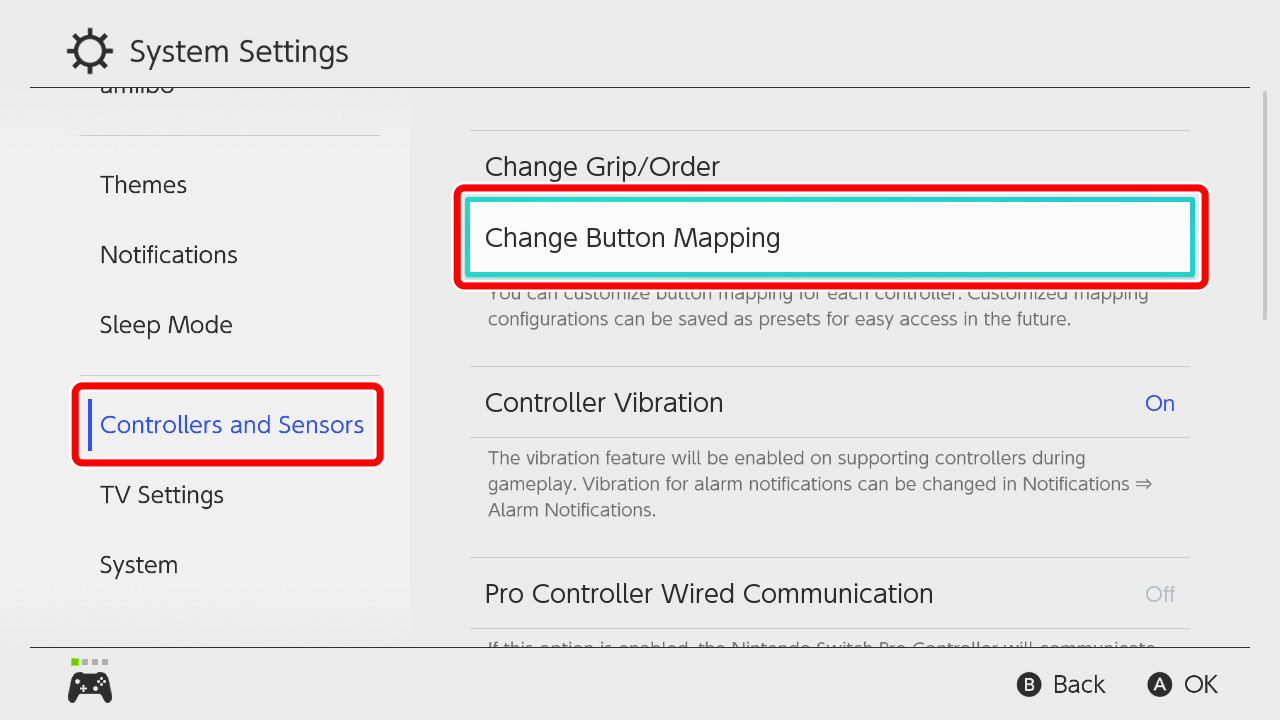
From the HOME Menu, select "System Settings" → "Controllers and Sensors" → "Change Button Mapping".
-
2
Pick the controller whose button assignment you'd like to change, then select "Change".
-
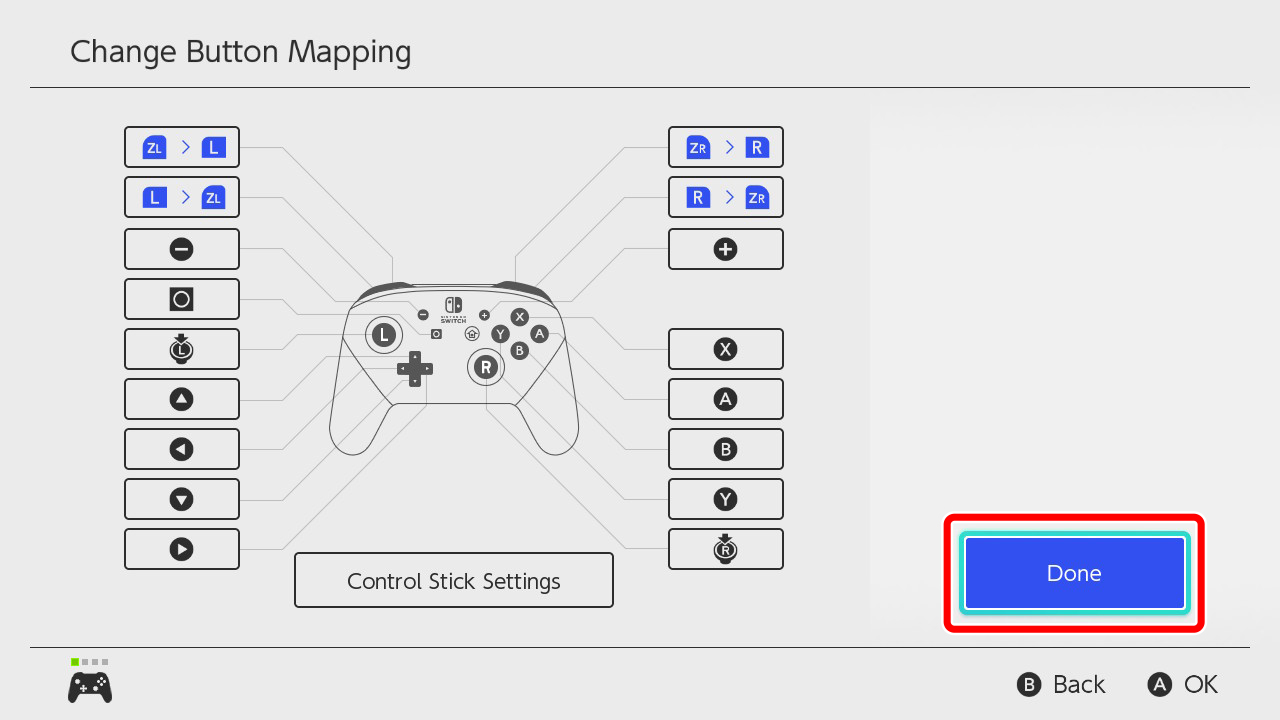
3
Follow the on-screen instructions to make your changes, then select "Done".
-
4
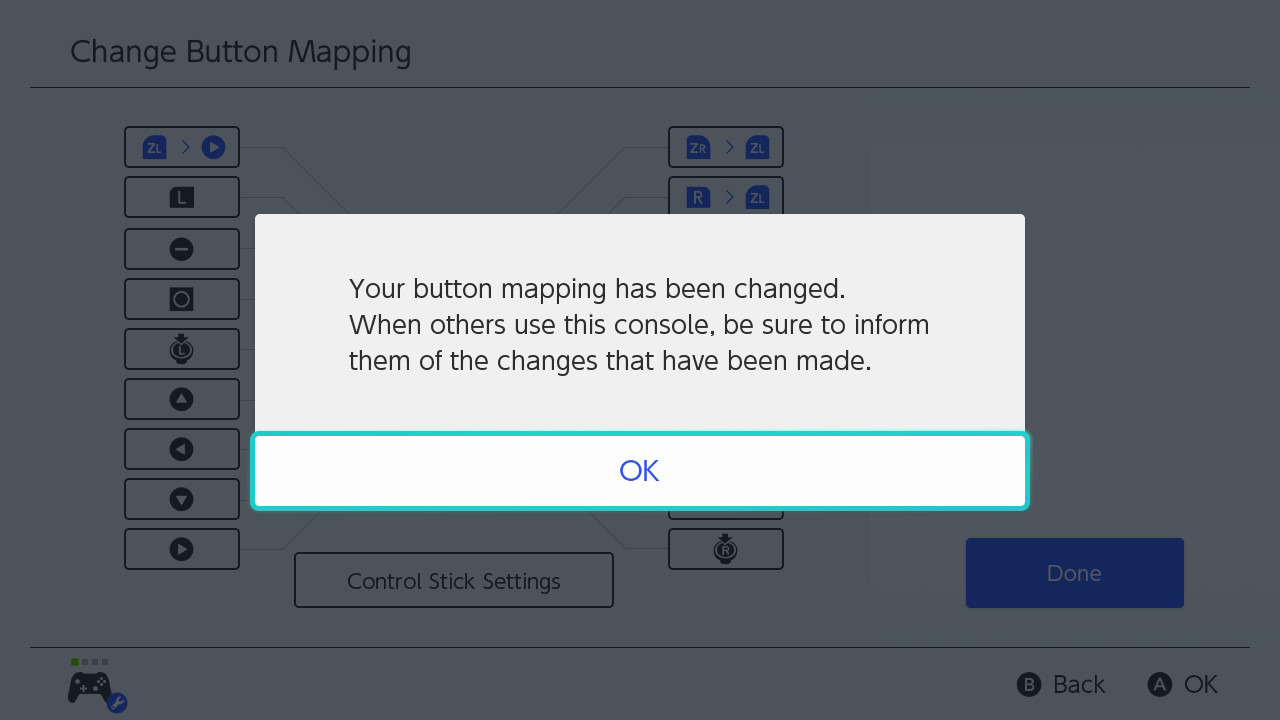
When the message "Button Mapping Changed" appears, the process is complete. Please let other users of the controller know.
How to tell a controller's button mapping has changed
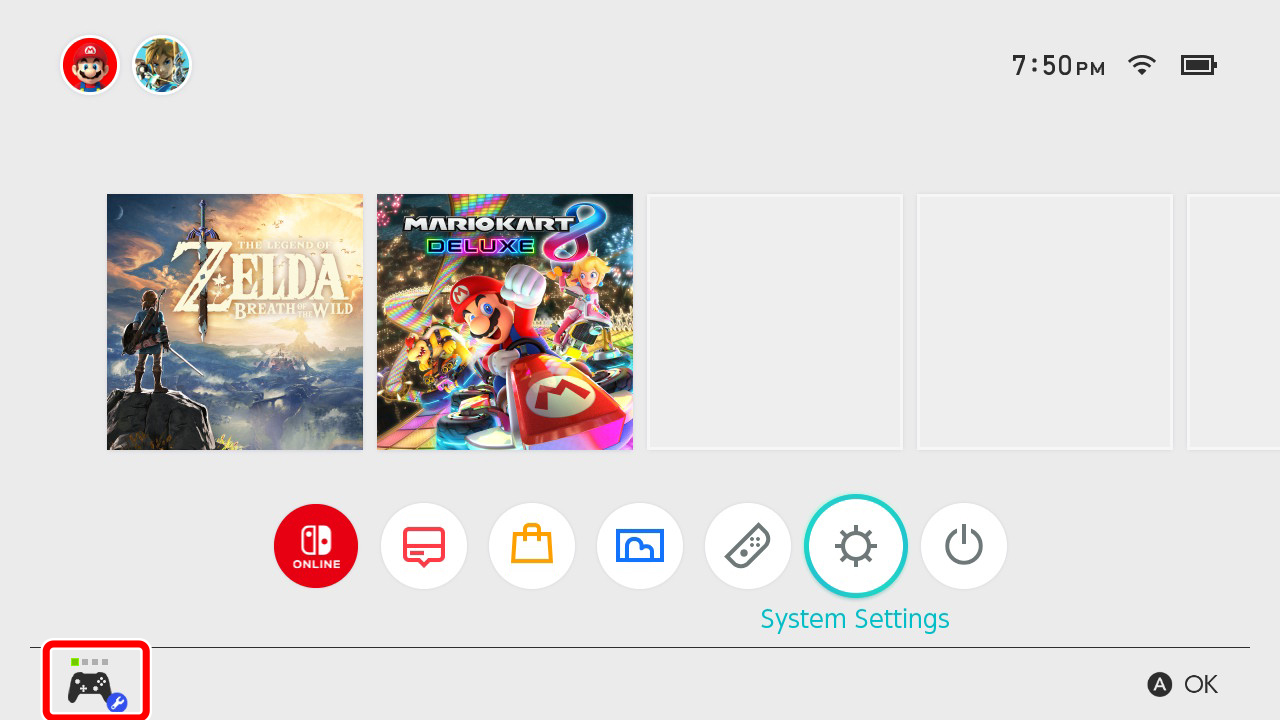
When button mapping changes have been made, a spanner mark will be shown over the controller icon at the bottom-left of the screen.
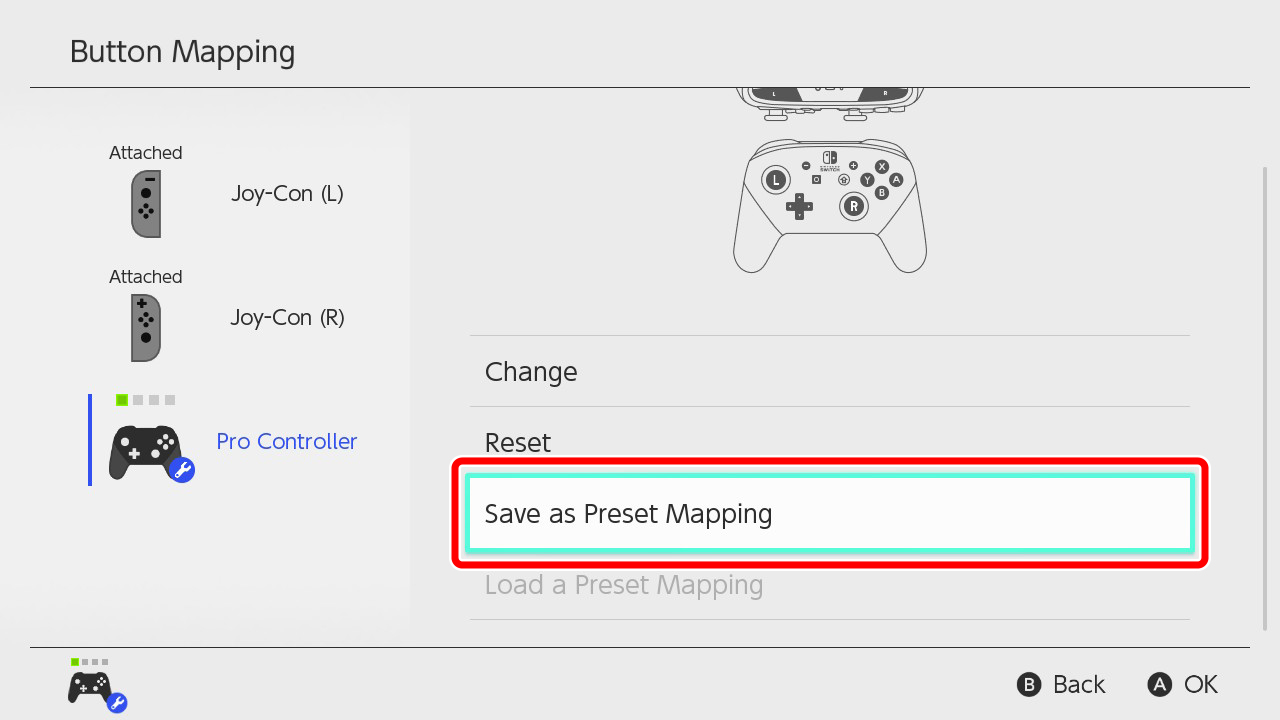
Saving your favourite button mappings
For each type of controller, you can save up to five button mapping profiles as "Favourites".
*Joy-Con (L) and Joy-Con (R) are treated as distinct controller types.
*Controllers differing only by colour are treated as the same controller type.
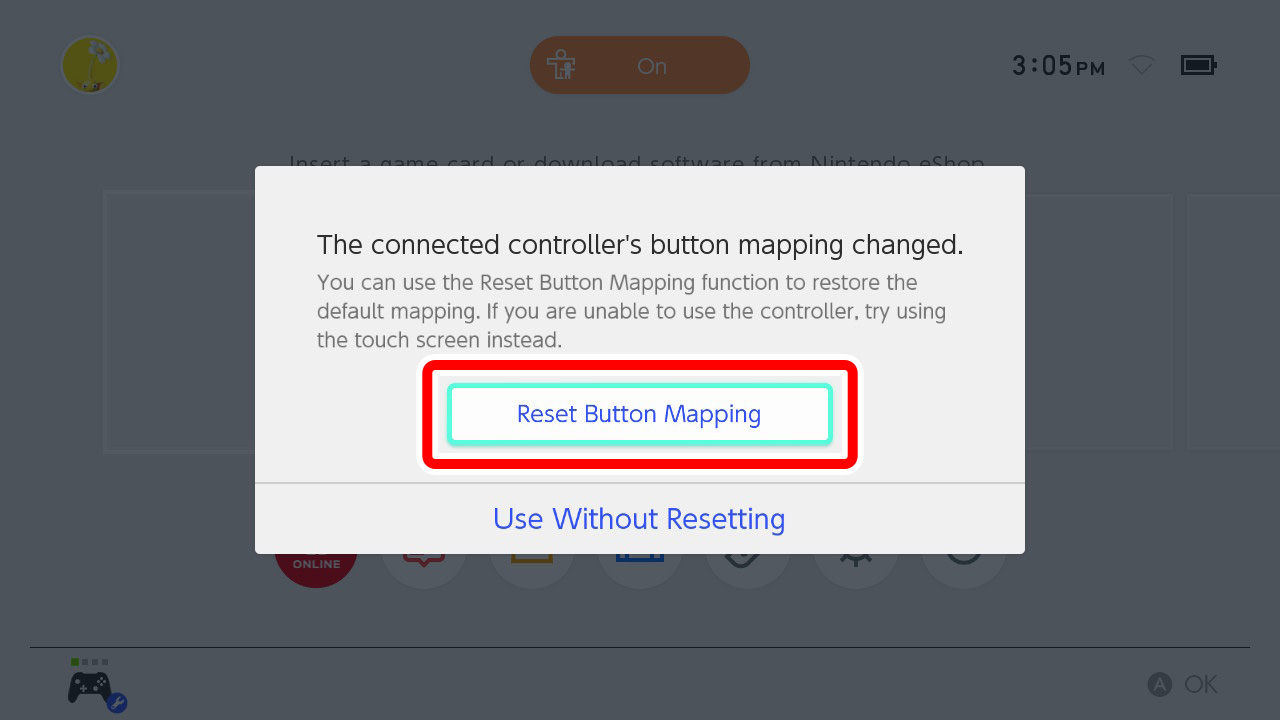
If you can no longer use a controller after a button mapping change
Resolving problems
If you want to use your Nintendo Switch Pro Controller as a wired controller
You can configure your Nintendo Switch Pro Controller as a wired controller while it's connected to a Nintendo Switch dock via a USB charging cable.
From the HOME Menu, select "System Settings" → "Controllers and Sensors", then turn on "Pro Controller Wired Communication".
*While connected as a wired controller, NFC cannot be used.
If you'd like to use your controller with a different console
Nintendo Switch Pro Controllers can only be paired with one console at a time.
This means that whenever you use the controller with a different console, you first need to pair it with that console.
If you can no longer use a controller after a button mapping change
Briefly press the POWER Button on the console to make it enter Sleep Mode. Then press the button again to wake the console, and proceed to the HOME Menu. The screen pictured will appear, from which you can select "Reset Button Mapping" to restore all button mappings to their default settings.