How to Manually Set Up an Internet Connection
Important Note:
The following steps are for users who have a unique home network setup (typically when the DHCP server is turned off). Most people will not need to use this process. Unless you know you need this option it is highly recommended that you try the "Search for an Access Point" option first (see ‘How to Connect the Wii U to a Home Network’).
What to Do:
Using your PC, first locate your network's IP address information.
The following steps differ when using a Windows or MAC OS.
Windows:
Select the Start button located in the bottom left corner.
Type Run into the Start Menu search and press Enter. (If no search is present, a "Run" option should be present instead.)
Type CMD and press Enter.
Type ipconfig/all and press Enter.
Your network’s IP information should now be displayed. The following may be used when connecting your Nintendo system online:
IPv4 Address
Subnet Mask
Default Gateway
DNS Servers
MAC:
Select "System Preferences" from the Apple Icon in the top left corner.
Select "Network" under "Internet and Network".
On the left side, select the type of connection you are using (Airport, Ethernet, etc.) The active connection should say "Connected."
Select "Advanced."
Click the TCP/IP button.
The router’s IP address is listed as "Router."
Your network’s IP information should now be displayed. The following may be used when connecting your Nintendo system online:
IPv4 Address
Subnet Mask
Default Gateway
DNS Servers (located under the DNS button)
2. From the Wii U Menu, select "System Settings."
3. Using the Left Stick select the "Internet" icon and press the A Button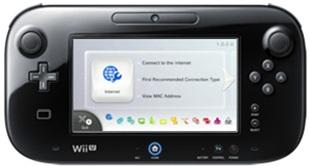
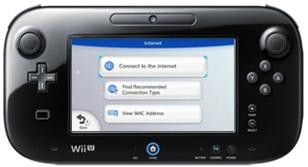
4. Tap "Connect to the Internet."
5. Tap "Connection Types" or press the Y Button.
6. Select "Manual Connection."
7. Tap "SSID" and enter your Wi-Fi network’s name (case-sensitive).
8. Tap "Security" and select your encryption method, then enter in your Wi-Fi network’s security key.
For assistance finding your Wi-Fi network’s security key, please refer to the product manual for your router, the router manufacturer’s website or contact the router manufacturer directly.
Alternatively if your router was supplied by your Internet Service Provider you may need to contact them for details on how to obtain this information.
9. Tap the arrow on the right and select "IP Address."
10. Tap "Don't Auto-Obtain" and enter the following information, ensuring you enter the "." between each set of numbers:
Tap "IP Address" and enter your IP address by adding 10 to the IP address listed in your PC.
Example: If your computer's IP address displays 192.168.2.5, you will enter it into the Wii U as 192.168.2.15
Tap "Subnet Mask" and enter the subnet mask as it appears in your network settings. Often, this is 255.255.255.000.
Tap "Gateway" and enter the default gateway as it appears in your network settings.
11. Tap "Confirm."
12. An on-screen message will ask you to configure the DNS settings. Tap "Configure."
13. Tap "Don't Auto-Obtain" and enter the DNS info as follows, ensuring you enter the "." between each set of numbers:
Tap "Primary DNS" and enter the first DNS address listed on your Windows IPCONFIG or Macintosh Network dialog box found on your PC (alternatively you may need to contact your internet provider to obtain this information). Then tap "OK" to return to the DNS screen.
Tap "Secondary DNS" and enter the second DNS address listed on your Windows IPCONFIG or Macintosh Network dialog box found on your PC (alternatively you may need to contact your internet provider to obtain this information). Then tap "OK" to return to the DNS screen.
14. Tap "Confirm" to return to the manual settings screen.
15. If you are using a proxy server, tap the arrow to the right, select "Proxy Settings," and enter in your proxy information (most networks do not require this configuration).
16. When finished, tap "Save “or press the B Button.
17. Tap "Save" again.
18. Tap "Connection Test" to test your connection.
19. Tap "OK" if the connection test was successful. If you receive an error code, click here and enter your error code into our error code lookup tool.
20. If you wish to set this network as your default network, tap "Set."